INTRODUCTION: The following tutorials were something I promised to do for Shadow Guard as part of the Raven Wing Project I am working on for him. Most are quick and easy. They aren't meant to give you tips on winning a golden demon or any other painting prize. They are however a way to have a decent looking army in a short amount of time. Many times in these tutorial your going to see non-GW paint names. I have nothing against GW paint, I think it is great stuff. The bottles for it on the other hand..bleh. So where possible I will include a GW equivalent (or close enough for government work) for the colors I use. That said, please understand that these are how I do these particular things. It is not the Games Workshop way, the Cool Mini or Not way, heck some might say it is not even the "right" way. All I can promise is that it works and if you choose to follow it, your army will at least be presentable on the table. Above anything though I hope that folks who are looking to start painting or improve their painting can learn something. So any comments / critiques you want to fire at me feel free: [ email: menshakhaine@hotmailcom ] |

PAINTING MASTERCLASS ANGELS OF VENGEANCE MARINE By Matthew Hunt ( Kurgan ) |


PAINTING THE UNFORGIVEN |


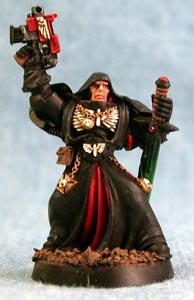
Step 28 - Bone areas are finished off with a GW Skull White highlight. The eyes on the face were also done at this time. Don't worry, the bug eyes gets fixed later. |
">

">
">
">
">
">
">
">
">
">
">
">
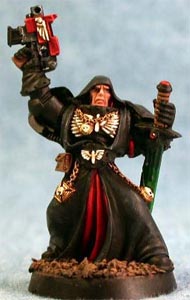
Step 29 - The robe then gets a second highlight of 50/50 Chaos Black/Shadow Grey. |
Step 30 - The black portions of the armor get a first highlight of 2 parts Shadow Grey/1 part Chaos Black. |
Step 31 - The armor then receives a final highlight of Delta's NightFall Blue. |
">
">
">
">
">
">
">
">
">
">
">
">
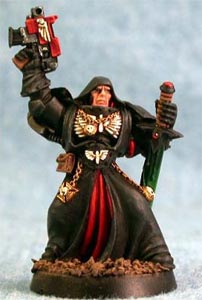
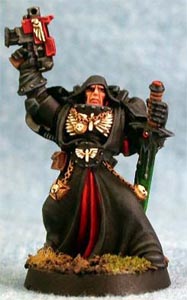
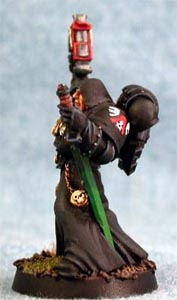
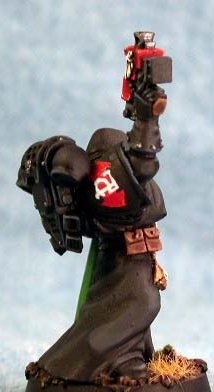
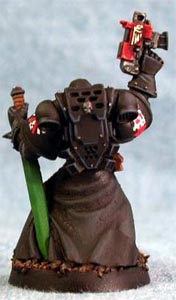
Step 32 - The mini gets finishing touches here. First touch up an areas where the paint may have gone haywire on you. Metal studs on the armor were picked out in GW Boltgun Metal. Chapter and Squad markings were then added to the shoulder pads. The backpack was attached and the mini was given two coats of GW Purity Seal. |
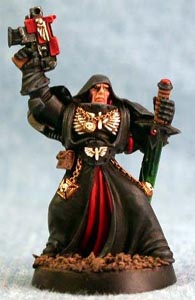
Final Result |
">
">
">
">
INTRODUCTION: The following tutorials were something I promised to do for Shadow Guard as part of the Raven Wing Project I am working on for him. Most are quick and easy. They aren't meant to give you tips on winning a golden demon or any other painting prize. They are however a way to have a decent looking army in a short amount of time. Many times in these tutorial your going to see non-GW paint names. I have nothing against GW paint, I think it is great stuff. The bottles for it on the other hand..bleh. So where possible I will include a GW equivalent (or close enough for government work) for the colors I use. That said, please understand that these are how I do these particular things. It is not the Games Workshop way, the Cool Mini or Not way, heck some might say it is not even the "right" way. All I can promise is that it works and if you choose to follow it, your army will at least be presentable on the table. Above anything though I hope that folks who are looking to start painting or improve their painting can learn something. So any comments / critiques you want to fire at me feel free: [ email: menshakhaine@hotmailcom ] |