INTRODUCTION: The following tutorials were something I promised to do for Shadow Guard as part of the Raven Wing Project I am working on for him. Most are quick and easy. They aren't meant to give you tips on winning a golden demon or any other painting prize. They are however a way to have a decent looking army in a short amount of time. Many times in these tutorial your going to see non-GW paint names. I have nothing against GW paint, I think it is great stuff. The bottles for it on the other hand..bleh. So where possible I will include a GW equivalent (or close enough for government work) for the colors I use. That said, please understand that these are how I do these particular things. It is not the Games Workshop way, the Cool Mini or Not way, heck some might say it is not even the "right" way. All I can promise is that it works and if you choose to follow it, your army will at least be presentable on the table. Above anything though I hope that folks who are looking to start painting or improve their painting can learn something. So any comments / critiques you want to fire at me feel free: [ email: menshakhaine@hotmailcom ] This tutorial is effectively a combination of the Dark Angel and DeathWing tutorials from earlier on. So to save time this won't be quit as in depth, but will reference previous areas in the tutorial section. |

PAINTING MASTERCLASS ANGELS OF REDEMPTION MARINE By Matthew Hunt ( Kurgan ) |


PAINTING THE UNFORGIVEN |
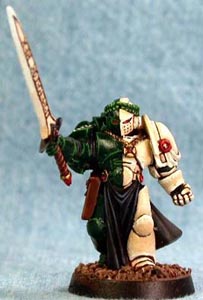
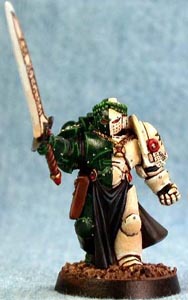
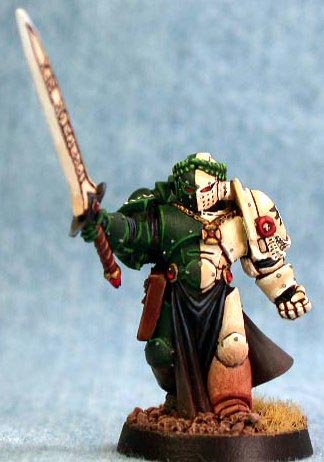
Step 10 - I wanted this bone armor (left side) to be a bit brighter than the Deathwing style. So after the initial base coat of Bleached Bone and a first highlight of NITRO Bone, I added another highlight, this time using Vallejo Ivory. |
">
">
">
">
">
">
">
">
">
">
">
">
Step11 - Metal Studs were picked out in Bolt Gun metal on both sides of the miniature. |
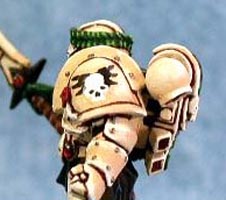
Step 12 - Now there is no Angel of Redemption decal. Not by GW or by Griffon Games. So improvisation is the next step here. I took a Blood Angel winged blood drop decal from the Space Marine decal sheet and placed that down as instructed in the DECAL tutorial. I then put down a small skull decal from the Imperial Vehicle decal sheet. These were then painted over like I normally do. Naturally those of you with better drawing talent could do all this by hand without decals if you choose to. |
">
">
">
">
Step 13 - Weathering was then done with Doc O'briens Weathering Powder from MICROMARK. I started with Rusty Brown, then highlight white and finished off with dirty brown. The mini was then finished off with static grass. The base-rim was painted Chaos Black and the mini was sealed with two coats of GW Purity Seal. |
INTRODUCTION: The following tutorials were something I promised to do for Shadow Guard as part of the Raven Wing Project I am working on for him. Most are quick and easy. They aren't meant to give you tips on winning a golden demon or any other painting prize. They are however a way to have a decent looking army in a short amount of time. Many times in these tutorial your going to see non-GW paint names. I have nothing against GW paint, I think it is great stuff. The bottles for it on the other hand..bleh. So where possible I will include a GW equivalent (or close enough for government work) for the colors I use. That said, please understand that these are how I do these particular things. It is not the Games Workshop way, the Cool Mini or Not way, heck some might say it is not even the "right" way. All I can promise is that it works and if you choose to follow it, your army will at least be presentable on the table. Above anything though I hope that folks who are looking to start painting or improve their painting can learn something. So any comments / critiques you want to fire at me feel free: [ email: menshakhaine@hotmailcom ] This tutorial is effectively a combination of the Dark Angel and DeathWing tutorials from earlier on. So to save time this won't be quit as in depth, but will reference previous areas in the tutorial section. |
