EMPEROR'S CHAMPION SHADOW GUARDS CHAPTER By ( Shadow Guard ) |


CHARACTER CONVERSIONS |
Step 6 - Painting and detailing: I had originally thought of coring out Ezekiels face and replacing it with the Blood Angels Honour Guard standard bearer's head, which had a laurel wreath on it. (I was not at all experienced in sculpting at this stage) However, very wisely, I decide against it, as I am quite sure that I would have wrecked the model. Instead I found the Terminator Chaplains banner pole which had a skull wearing a laurel wreath. That suited me fine, as it would again be a unique item, so up that went |
">

">
">
">
">
">
">
">
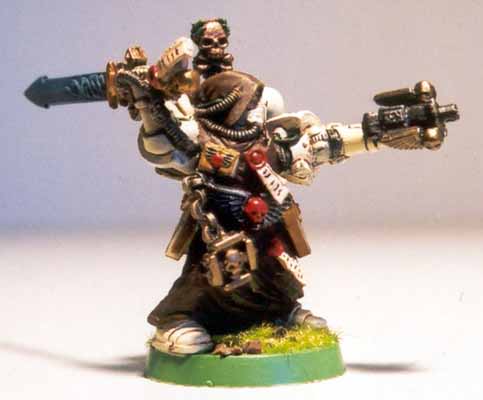
Step 11 - The finished product: The Emperor's Champion Gabriel Shadow Guards Space Marine Chapter |
Birth of a Shadow Guard Emperor's Champion: Initial concepts and Thought Process I first started to convert an Emperor's Champion for the ShadowGuards Army, when I mistakenly thought that it would allow me to field the EC as a third HQ without taking up an HQ slot, similar to the Black Templars list. As the idea grew on me I wanted to create an EC that was quite different to what I had witnessed mostly on-line and in magazines. The EC in my army had to fit in with the overall theme, therefore had to be robed. He also had to be different as I was quite adamant that every miniature was distinct on it's own right. I wanted him to have a large and ornate sword, and a laurel wreath of some kind to signify the Iron Halo as well as his special position. I also wanted this miniature to be cluttered with as many items as possible, as distinctive from my geneally clean-looking troops. I wanted him to have the black sword in his right arm swinging back behind his nack and his left arm pointing straight forward along his eyesight, taking aim with the master crafted bolt pistol. |


Figure 1 |
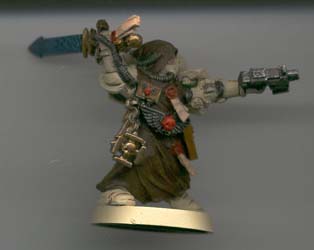
on top of his back pack. One final addition was to add a skull and one wing cut out from thestandard back pack banner ple to either side of the bolt pistol and paint it to make it look bulky, archaic and different, to signify the mastercrafting of the weapon (figure 10). With that the model was done, bar the painting and screaming! As for painting, I used my favourite borwn - scorched brown - for his robes, it being the colour scheme of the Shadow Guards Chapter. A bit of blending on the armour and scorched brown lining of the joint lines. A tiny bit of skull white highlight and all was ready. for the final touch up of the various bits. I did the power sword in my usual way. White undercoat (brings out the blue better) Then a base coat of strom blue, followed by a gradual dry brush of enchanted blue and ice blue to make it look like blue electricity flowing through the sword. The bleached bone of the armour required multiple thin coats of paint, each one slightly thinner and whiter than the previous one to achieve a good overall cover. I did this as a natural progression from the overall coat of bleached bone. Later I learned what I had in fact done was the technique of blending, so talked about in the chat boards. The robes were dry brushed with snake bite leather to highlight the folds. I hadn't discovered the virtues of the black wash yet, at this time, so a bit more time was spent of brown lining the joints and corners of he armour. The base was painted in goblin green an flocked with static grass. I was so excited atthis stage, this being my very first true conversion, that I didn't want to spend any more time detailing/ |
Figure 9 |
Figure 10 |