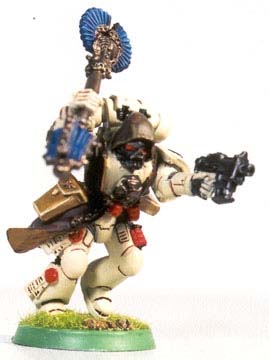
Step 6 - Final detailing.. Now the stage was set for the chaplain to come together. I had already positioned pins in the body to support the ams. I again spent a bit of time getting the model standing upright, and positioning the arms so that they were just right. The chaplain would be charging with the bolt pistol in his left hand pointing at the enemy while wielding the crozius in his right hand, ready to swing. The left arm was carefully positioned so that the bolt pistol was lined up along his eye level. Cyphers cloak and bolt pistol holsters had a very dynamic image to them, as if they were being thrown about as the chaplain charged. I was glad I had swapped to the Cypher model for this project. Finally the detailing was added in way of the litanies on the purity seals and final touch ups. Looking back it is probably one of my better conversions. While this is nowhere near the high standards displayed by many in the hobby, it just proves that anyone can create a reasonably effective conversion, even without using the much vaunted green stuff putty. |

INTERROGATOR CHAPLAIN SHADOW GUARDS CHAPTER By ( Shadow Guard ) |


CHARACTER CONVERSIONS |
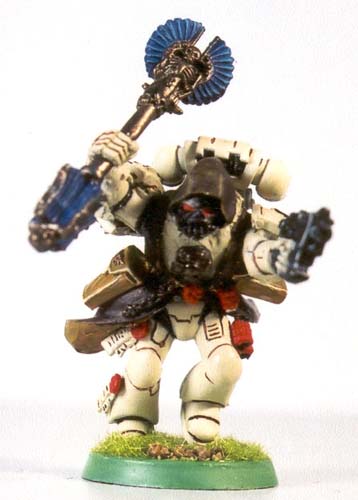
Step 4 - Adding details: I now set about adding some details. I started by re-painting the armour on the whole model with bleached bone, and adding the brown lining to all the joints. A plastic terminator donated his knee pad crux terminatus to adorn the chaplains chest which covered the earlier hack work. A little bit of highlight to the robes, and the Chaplain was looking like ending the way I had imagined. (figure 07) The charging legs and tCypher's flowing robes seem to come together well. |
">

">
">
">
">
">
">
">
Birth of a Shadow Guard Interrogator - Chaplain: Initial concepts and Thought Process Having completed my 1500 point Shadow Guard Army I set about creating the next 500 points. The core of my army was mechanised and made out for a mobile and firepower based army. The models all posed in a way that represented steady firing poses. So I decided that the next lot was going to be assaulty. I had planned a ten man assault squad, each posed with different close combat or power weapons. I needed a chaplain to lead the aasault and it had to be a dynamically posed model to accompany my charging assault squad. What I wanted to create was a charging chaplain in a very threatening and imposing mood armed with a master-crafted crozius arcanum and a bolt pistol. |


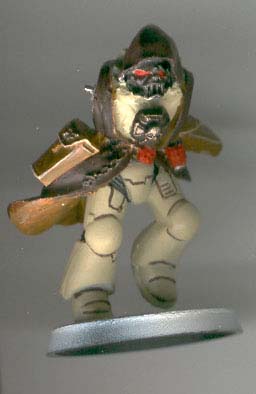
Figure 7 |
">
">
">
">
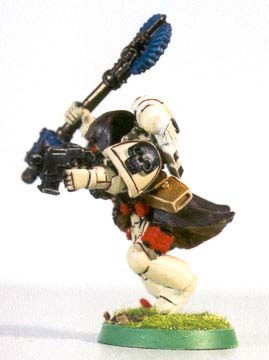
Step 5 - Master Crafted Crozius: I also spent quite a bit of time on the weapon arm. The crozius was master-crafted, so had two heads. I wanted it to look like an ancient weapon, so after a white under coat I painted it with scorched brown and then brazen brass. Finally dry brushing burnished gold gave that worn but expensive look. As usual the heads of the Crozius, which wasa power weapon, got the storm blue/enchanted blue/ice blue treatment. (figure 08) |
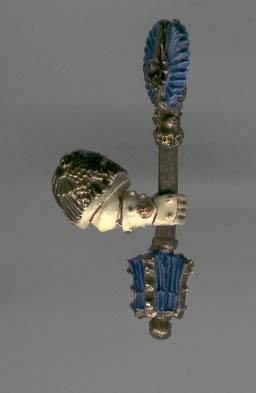
Figure 8 |
">
">
">
">