

ANGELS OF REDEMPTION PAINTING GUIDE By Douglas Miller (ODM) |


PAINTING THE UNFORGIVEN |


This article has been published here with the express permission from Douglas Miller. |
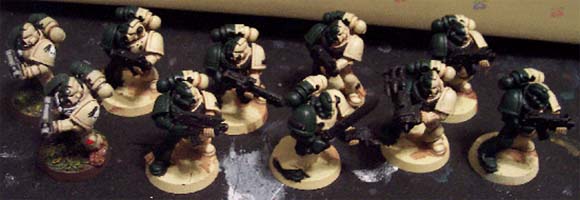
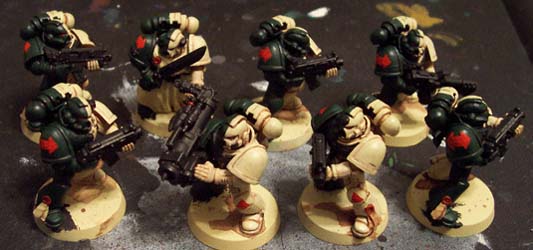
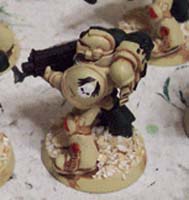
Step 4 - I repeat the armor painting process on the other side. DA Green for all armor sections, letting the Chaos Black underneath show through for all the details. |
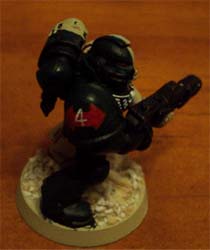
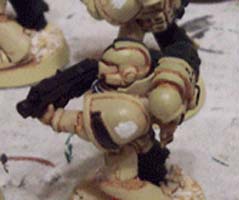
Step 5 - I added all the red bitz next. All painted using blood red. Eyes and lenses are painted red over the Chaos black, then cleaned up with a black outline as needed. Purity seals are red also, but in the center, the black is allowed to show through to give the wax stamp some character. The Army Badge I use is a simple one, a red triangle on the left knne or grieve. I paint the outline first, then fill it in. Same process on the tactical squad markings. Two parallel bars first. These are important to get parallel to the bottom of the shoulder piece. Then I fill them in and outline the arrows, which are filled in finally. The tactical arrows always take a second coat as the green shows through, but I am not looking for super bright arrows, so only one additional coat. |
">

">
">
">
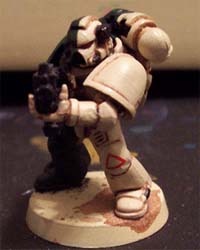
Step 6 - I use Skull white to paint in the Squad number. A nice thin brush and even paint are the keys. Don't blob it. The same theory on the chest eagle and a dot in the back corner of the eyes for lens reflection. In each case, I use the under colr to clear up any mistakes. I find patience is the key here. Taking the time to clean of the brush and shake the paint between each mini. |
">
">
">
">
Step 7 - Chapter badges. The first stage of the badge is the white. Here I roughed in the shape in white (sort of a pear with toothpicks sticking out the bottom. Then I painted the skull face, placing the nose first as a small vertical line. This helps position the eyes, and pakes sure room is left for it, otherwise the eyes can end up too close in. The eyes are positioned low on the skull in this logo. After the skull had a face, i painted in the wings. First I painted to black lines running up the side of the skull, ending like horns pointed towards each other. Then, from each horn point i painted the outside line of the wing, giving it shape. Finally, I painted the center feather between the two already in palce, and filled in any empty space in the wing body. |
">
">
">
">
">
">
">
">
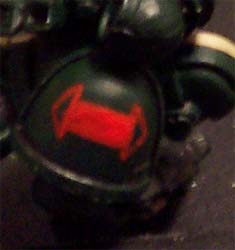
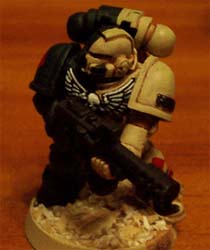
Lots of touchups using bleached bone to give the skull and wings any necessary shaping. again, the key is patience. Cleaning off the brush and shaking the paint between pads ensures no blobby paint. Also, you'll notice I used thin brown paint to add text to all the purity seals somewhere along the way. |