ANGELS OF REDEMPTION PAINTING GUIDE By Douglas Miller (ODM) |


PAINTING THE UNFORGIVEN |


This article has been published here with the express permission from Douglas Miller. |
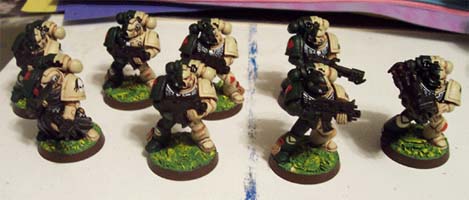
Step 8 - I used Mythril Silver to pick out all the bolts, ventilator hoses, fins on the backpacks, helmet targeters, misc. skulls, boot hoses, etc. This is another case where keeping the paint from glooping is important, as the metallics really want to do it. Most touch ups were accomplished with Black, as they help outline the silver anyway, making it pop. My Sgts. robes got the Chaos black treatment. Then I used a controlled dry brush line and Codex Grey to paint all the folds and ridges in the material. This is pretty stark contrast, but I don't mind it in this case, as it will help him stand out on te tabletop, where these guys are destined. |
Step 9 - A little earlier I added the texture to the base. Oatmeal flakes work for me. In this step I have added the base colors (pun intended). Goblin green base, with a light drybrush of yellow. I also glued a penny under each plastic mini t give them more stability and weight. |
">

">
">
">
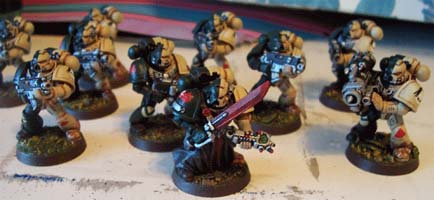
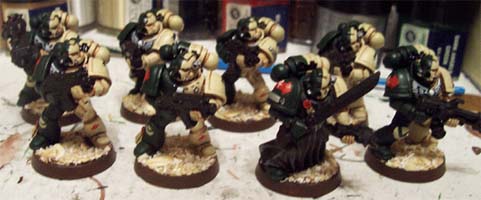
Step 10 - Quite a bit going on here. I added a heavy brown wash to the bases. I want the ground to look like a muddy, churned up field. Like after a mud football game. I then brush the boots, and bottoms of the robes, over with a drush with a light coat of brown again. Not an even coat here. Trying to get the look of soldiers slogging through the muck. For the weapons, I pick out the detail in Mithryl Silver, keeping all the weapons casing black. For the sword, same thing. I have decided my DA power swords are red, echoing a lot of their artwork and chapter symbols. I paint the sword a coat of red gore over the black, then with blood red, working down from the top, so more red gore shows through towards the handle. I drybrush Scorched Brown over the business end of the flamer for that freshly flamed look. |
">
">
">
">
">
">
">
">
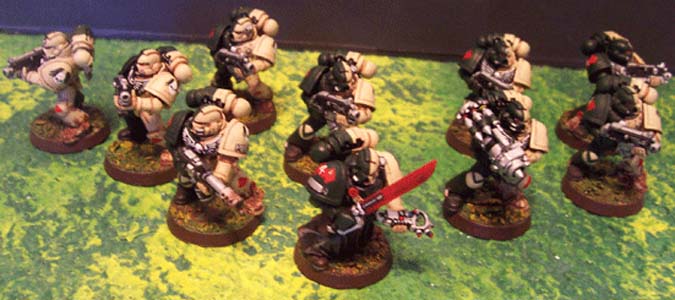
All the company badges were painted using bleached bone over the green knee pads. On the knee pads, it's not too difficult to paint the outline of the V shape first, then just fill in the bone areas, letting the existing green show through for the chevron. Those marines that have the badge on their greaves, I painted a full bone circle, and painted the DA Green Chevron over it. |