Step 5 - Putting it together: Now that the torso is separated form the GK body, it is time to make it look more like a regular terminator. First take the plastic hump bit from a plastic terminator. You are going to have to cut it so that the front |

CONERTING A DEATHWING TECHMARINE By Fabio van der Merve |


CHARACTER CONVERSIONS |
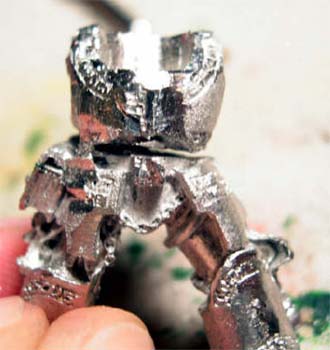
Step 4 - I can't feel my legs: The last step in getting the torso ready is to separate it from the legs. You do not have to do this, but I do it because it makes the torso easier to deal with, and lets you move the position to get a variety of poses |
">

">
">
">
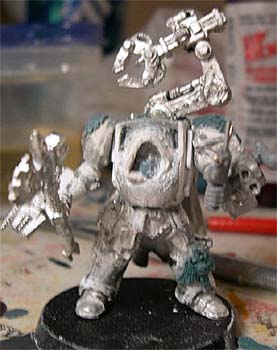
Converting a Deathwing Techmarine: Initial concepts and Thought Process After the 2004 Boston GT, I decided that I was going to enter my Deathwing command squad in this year's Golden daemon competition. Looking at the command squad, I realized I could not call it a true command squad unless I had a techmarine to go along with my apothecary. Since I have gotten a lot of emails about how I converted my terminators, I decided to document the process, in the hope that some questions were answered. I am going to do this in parts as I have a lot of pictures, and putting it all in one thread would cause it to take for ever to load. I must warn you that this conversion is not an easy one to do. It took me three initial test models and 17 terminator conversion to get good at it. Hopefully, people can take away something in order to make their terminators look better, until the new terminators are released. Questions and comments are always welcomed. |


Figure 6 |
Figure 5 |
Step 6 - Filling it in: Once the back vents and the hump are glued into place, it is time to fill in any gaps with milliput. I use a lot of milliput because I will eventually sand it down to a point that will extend the width of the terminator. You can decide how wide you want the terminator to look by leaving more or less of the milliput. |
">
">
">
">
As you can tell, the hump does not sit completely flat, but rather it sits at an angle on the torso. I did this because if you look at the top of a terminator is slops downwards. You want to make sure that yours does the same. Any gaps will be filled in later. |
">
">
">
">
Step 7 - Assembly: As you can see, I already changed out the hands on the right arm with |
">
">
">
">
Step 6 - Putting it together: Once you glue the hump on, you will see that in the back it extends past the greyknight torso. Here is where you need to replace the vent you originally cut off the plastic hump. To do this I made a green stuff mold of just the vents. Since this guy is going to be wearing a cloak I do not need to fill in the space between the plastic and the greenstuff. If he did not have a cloak I just would use some milliput to fill in the gap. |
">
">
">
">
">
">
">
">
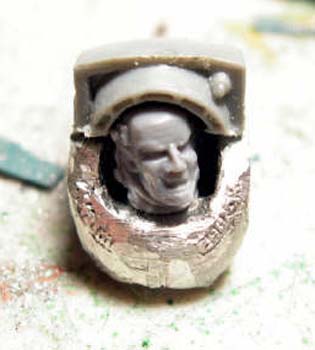
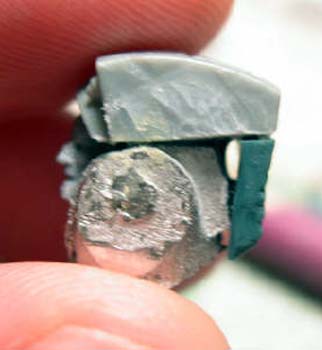
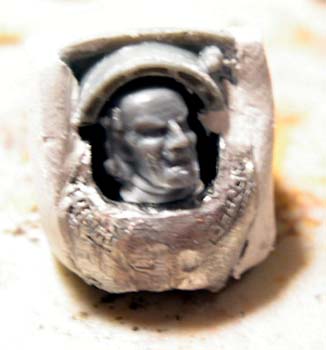
Step 8 - Cowl and face plate: I used some greenstuff to make the face plate seen on the tech adept. For the cowl I rolled out some milliput to a thin sheet, then I cutout a pattern and placed it over the head. Don't worry if it sticks out too much, as it can be sanded down once it dries. The most important thing is to get the shape. |
opening and the hump is left. The guides I use to make this cut is by first counting the vent ridges found on the back of the plastic piece From the top, count three ridges, after the third ridge you want to make the cut. Once the hump is cut and sanded smooth go ahead and test fit it to your torso. It is a good idea to go ahead and place the head you plan to use on the torso to make sure it fits. |
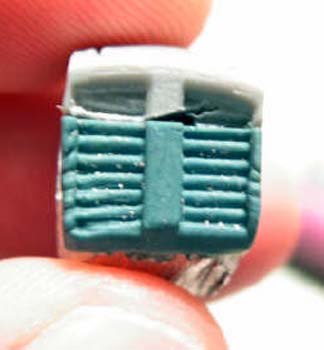
Once the milliput has been sanded to the desired width, I then need to make some spacers in order for the arms to be glued back on. If you look at the plastic terminator it has a spacer to allow for some room between the arm and the torso. I was a thin piece of plastic card for the spacer, and tried to copy the shape seen on the plastic terminator. |
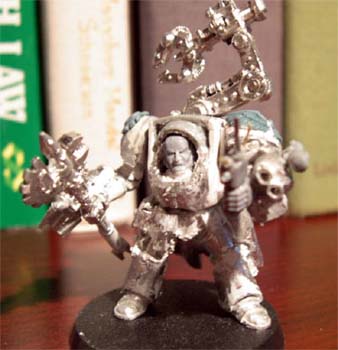
the tech adept axe, and the left arm is now holding an auspex. It is a very good idea to test out your pose to make sure it looks right. After doing such test, I realized a needed to make the right hand extend out a little more so he would like a little more imposing. I had to cut it and pin it back in the right position. |