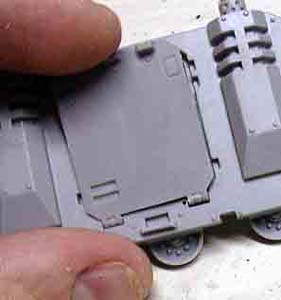
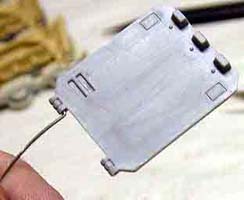
Step 7: So, now you should have a door with two wires sticking out of the bottom of the hinges. Take that, and insert the exposed wire ends into the holes on the outside of the Rhino. You may need to carefully adjust the angle of the wire "L" to where you drilled your holes. Again, be very careful and don't torque the hinges. Test the fit by carefully operating the door. The position might require some adjustment, but keep in mind it's not solidly fixed yet. Once you are satisfied with the fit, superglue the wires on the inside of the Rhino. Do not glue the outside hinges at all, or your doors will not open and close! Clip any excess that sticks out too far. Set this aside to dry. Do the other side of the Rhino. |

HOW TO HINGE A DOOR ON A RHINO MKII By Erik Johnson ( Dr Zero ) |


VEHICLES & WARMACHINES |
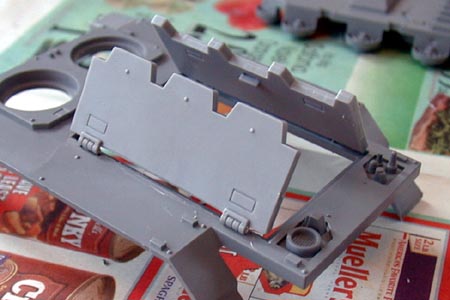
Step 1: Test the door for proper fit. Forgeworld extra armor parts and Rhino doors with iconography are not always the same size, and may need to be filed or cut to fit. Take a look at the areas of the Rhino on the inside of the hinges. This is where we will be drilling. It |
">

">
">
">
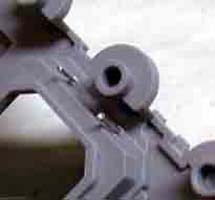
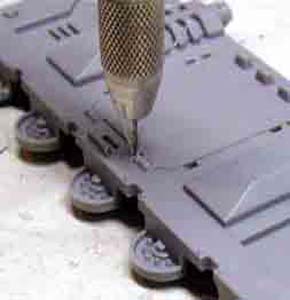
Step 2: Drill a hole into the hinge from the outside. Try and get it as evenly centered and straight through as you can. If you drill too close to the hinge edges, you run the risk of them snapping when you open the door. Drill all the way through the hinge. Do this with |
also helps to take an hobby knife and shave the edge off the lip on the Rhino itself between the hinges and below the door. This will allow the door open easier when we get it finished. It's not required, but it helps. |
">
">
">
">
Step 8: Once you have the hinge glued in, you will need to fill the holes on the outside of the Rhino with Green stuff or some modeling putty. Take care to keep the putty away from the door, and only on the body of the Rhino. You want to ensure nothing gets into the hinge to keep it from moving. Putty and Green Stuff both will weld plastic to metal |
">
">
">
">
">
">
">
">
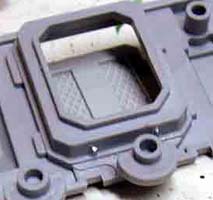
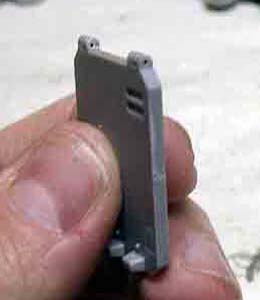
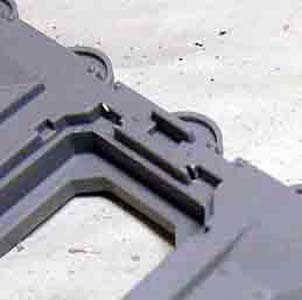
Step 4: After you drill, take a hobby knife and cut away the plastic between the hole you drilled and where the hinges go. This will allow the wire to be set recessed into the body of the Rhino. |


">
">
">
">
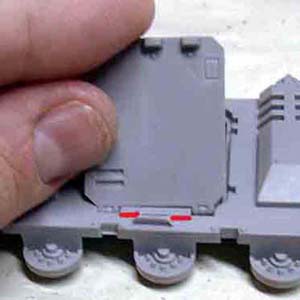
Step 3: Set the door into the recess where it fits on the rhino. Using the same bit, drill into the Rhino right where the hole you made in the hinge goes. |
Figure 6 |
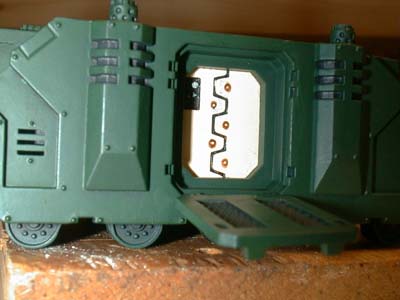
That's it! Once your doors are hinged and puttied, then you can assemble the rest of the Rhino. If you plan on painting the inside of the Rhino doors, you should be able to close the doors and spray your colors over them. Once that's done, you can swing your doors open and paint the insides with a brush. If you want to hinge the top door of your Rhino, you can use a similar method as the one presented here, but getting the door alignment is trickier. Also, keep in mind you can't make your Rhino into a Razorback if the top doors are permanently affixed. |
Figure 7 |


How to hinge a Rhino MkII door: Initial concepts and Thought Process As promised to several people, here's the instructions for hinging doors for the new Rhino MK II kit from Games Workshop. I realize that there are a finite number of ways to hinge a door, and similar methods have been published elsewhere. This is the way I do it, however, and it has several differences. The method presented below hooks into the body of the Rhino, and as such, requires Green Stuff, or other modeling putty to finish. The advantage is that you do not have to cut the hinge of the door in half, and if done right, will be structurally stronger. It lends itself better to mass production. I hinged the all the doors of 5 Rhinos in about 30-45 minutes. It also hides the wire used for the hinges better. OK, on to the process. Preparation: You will need the following: Rhino kit; 22 gauge wire (I use steel); A pin vice with a NN drill bit (fits the wire perfectly); Hobby knife; uper glue; Green Stuff or similar modeling putty; Small needle nose pliers; Hobby files; Clip all parts from the sprues - clean up parts, remove flash, etc, etc! |
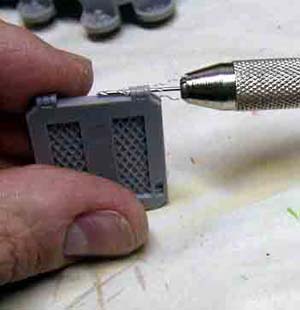
both hinges. It helps to take some wire and push it through the hole to clear out debris and test the fit. |
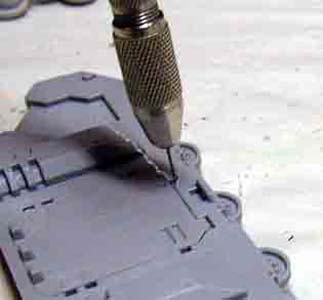
You want the hole to be at least one wire's width away from the edge. You'll be cutting away the extra, so don't worry. Be careful not to drill too high or low. The wire hinge will be off, and your door will either be hard to open or close, depending on which way you are off. Drill all the way through the Rhino's side. Try and keep your drill as straight as possible. If you angle towards the top of the Rhino too much, you'll also drill through the door well, and you'll make securing the wire more difficult. |
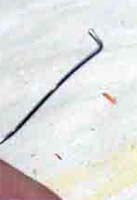
Step 5: Take your wire, and make an "L" shape in the end of it with your pliers. The small part of the "L" should be about the length of the door hinge. |
">
">
">
">
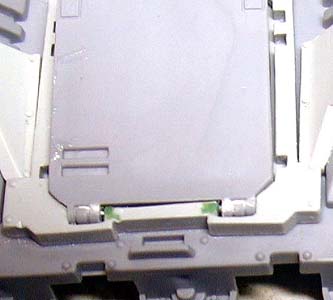
Step 6: Push the wire "L" in the hinge from the inside of the hinge. If you've made the "L" too long, cut the excess off the outside. Be careful when inserting the wire, and don't force it too much. You want a snug fit, but you don't want to snap the hinges off. Clip the wire leaving about 1/2 inch sticking away from the door. This goes into the body of the Rhino. If you make it too long, you can clip it later. Do this for both hinges. |
">
">
">
">