

...AND BROTHER FOUGHT BROTHER... By ( Insaniak ) |


SCENARY & BATTLEFIELDS |
">

">
">
">
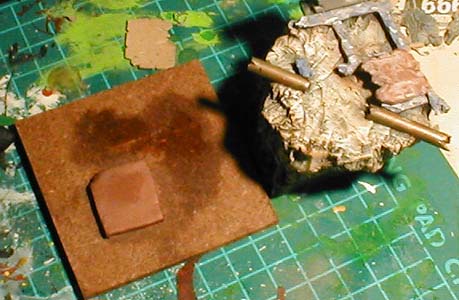
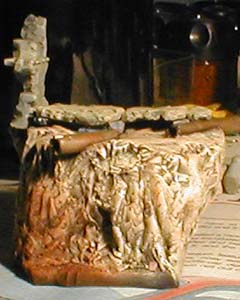
Stage 1: Preparing the Base (Cont): After some feedback from the good people at Dakka, it was decided that the cardboard tiles were just too thin, and had to go. So I ripped them off, and made new ones by pressing Kneadit flat under a damp piece of masonite as shown.(Stage 1I) Then I simply carved in the detail that I wanted with a hobby knife. I chipped away corners, gouged out chunks, carved in cracks, and roughened up the surface a little. The end result is almost the same pattern as I had with the cardboard, but much thicker. (Stage 1J) |
">
">
">
">
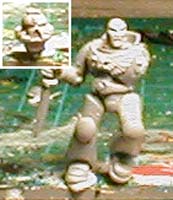
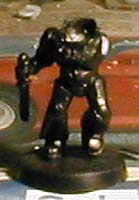
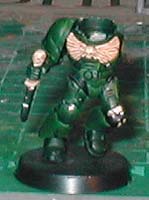
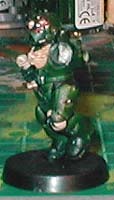
I now have the greater part of Gabriel ready to go, with his head, left arm, backpack and shoulder pauldrons to be painted seperately. I slapped him 'round with a pot of rather watery Chaos Black (Stage 2E) and then followed up with an equally watery Dark Angels Green (Stage 2F) and tried out my highlights on his right leg. The painting is coming along nicely with most of his body done not that you can really tell a lot from these crappy pics.(Stage 2G) There is actually a lot of battle scarring on the armour, carved in along the edges of the plating, plus a couple of bullet craters hacked in with a drill, then roughened up with the knife. |


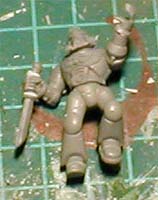
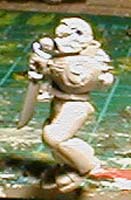
Stage 2: Avenging Angel - Brother Gabriel: I started by hacking up my marines to get the basic pose down. Only used Blu-tac at the moment while I ironed out some positioning problems. This was the final basic position I achieved with Brother Gabriel. Stage 2A) Warning: The following images may be upsetting to Space Wolf players! Take one SM helmet, and one Space Wolf head with all his hair shaved off! Then, using a 3mm drill bit, a hobby knife, and a fair amount of cursing, you hollow out the helmet. (Stage 2B) Finally, with careful application of a hobby knife, a nice gaping rent is torn down the side of the helmet, so that when it is placed on Gabriel's head, (Stage 2C) you can see his forehead and one eye through the hole. Unfortunately, my camera just isn't up to producing pics good enough for you to see it. Hopefully it will show up better once I get some paint in there. |


Step 1K |
Step 1L |
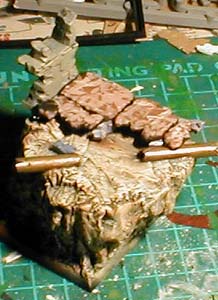
Slapped a quick basecoat onto the tiles to see how they would look. (Stage 1K and Stage 1L)) At this point I stopped working on the base and started on the two marine figures. I wanted them interacting with the base so that they looked like a part of it, rather than just a couple of models slapped onto a rock, which is why I've been concentrating on the base so far. Now that I've got the bare bones done, I can put the Marines in, and then go back and do the detail work on the base... |
Step 1J |
Step 1I |
Step 2A |
Step 2B |
Step 2D |
Step 2C |
Step 2F |
Step 2E |
Step 2G |
Step 2H |
Step 2I |
Step 2J |
Step 2K |
Step 2L |
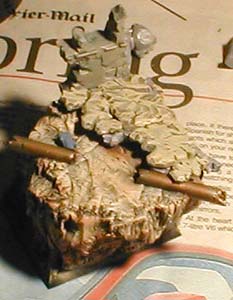
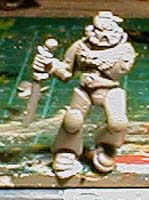
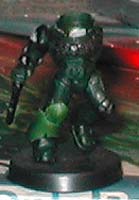
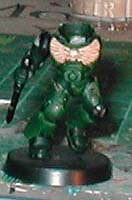
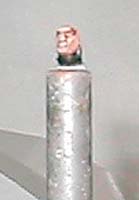
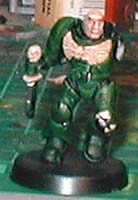
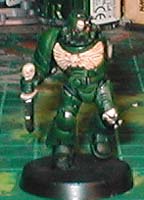
The armour started off as Dark Angels Green, with Goblin Green mixed in progressively for highlights. Got one greave done and decided this was giving far too rough an effect, so started over. Now using DA Green with Snot Green mixed in, and then a final highlight of Goblin Green on corners and sticky-outie bits. The battle scarring (which you probably can't see) was then re-undercoated in black, and painted with Boltgun metal. Eventually I'll add a highlight of silver. The chest eagle was painted with Vomit Brown, and then drybrushed with Bleached Bone. Again, this needs a final highlight yet, (Skull White), which I'll get to at the end. I generally paint marine shoulder pauldrons, heads and backpacks seperately from the model, so that you can get all the inner surfaces. (avoid unsightly grey patches) Now have all the basic work done on Gabriel. There's still quite a bit of detail to be added, but I'm kind of playing it by ear to see how much time I have. At this point, I can get his head put together, plonk him in place, and then see how Brother Hazael has to go together to fit in. (Stage 2H) I then painted Gabriel's Head, once again using the "Bluetack it to a stick" method... Probably spent a little more time on it then it deserved, seeing as how it's going to be mostly hidden under a helmet, but hey, if you're going to do a job. Undercoat with Chaos Black, then Bestial Brown over the flesh bits. First layer with Vomit Brown with a little Bestial mixed in, then slowly adding Elf Flesh for the final Highlight. The neck guard was re-undercoated black, then the band around the back of the head painted with Boltgun Metal. The black was then highlighted with Shadow Grey. Teeth and eyes spotted in with Skull White. Eyes were then added with a dot of DA Green, and then a teeny little dot of black... Add on some black eyebrows, and then all that's left is to bash him around a little. Thin strip of Blood Red/Red Gore/Bestial Brown mix down the side of the nose, and a splash from the eyebrow back along his head, where it should show nicely through the tear in the helmet. (Stage 2I) Finally the head was placed on his body. (Stage 2J) Finally finished off Gabriel's helmet. Green done the same as the rest. Eyepieces done in Red Gore, then highlighted with Blood Red and Fiery Orange mix. Metal bits and battle scarring picked out in Boltgun Metal... The inside of the helmet is painted black. Then I put it on his head, and nearly fell off my chair.... It was hard to tell, unpainted, how well this was going to work, but now with all the paint on, there's this eye peering out from behind a shattered lens. You can see his head, complete with nasty bloody bits, through the rent. It looks far better than I had expected. (Stage 2K) |