

...AND BROTHER FOUGHT BROTHER... By ( Insaniak ) |


SCENARY & BATTLEFIELDS |
">

">
">
">
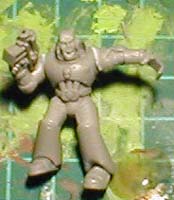
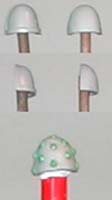
Stage 3: Fallen Angel - Brother Hazael: Brother Hazael will be wearing older style armour, hence the one-piece greaves. (Stage 3A) To go along with that feel, I shaved the rims off a couple of shoulder paultrons, and smoothed down the curve a bit, to make them look more like the old RT pads. Then added studs to the right pad. (Stage 3B) This was a technique I've heard of often, but never actually tried before. You get a small length of sprue, drill a really short hole in the end with a 1.5 mm drill bit, as a mould for the rivet head... put a dollop of Green Stuff on the surface you want the rivets on, and then press the end of the sprue onto it to make a rivet... Then just trim the excess GS from around the edges. It's a lot harder than it sounds! It took me three tries to get some of them sitting right, and will require a little bit of reshaping on one or two once they're set. |
">
">
">
">
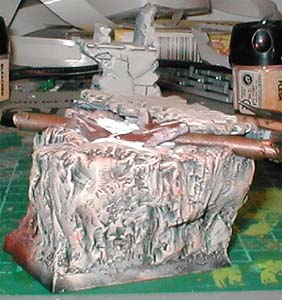
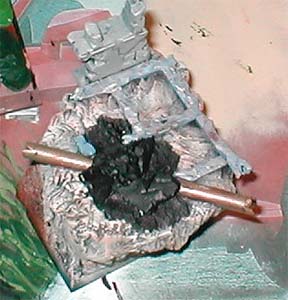
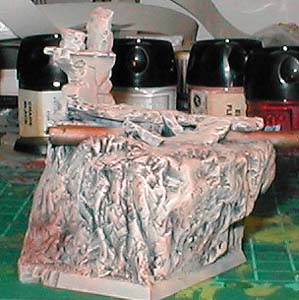
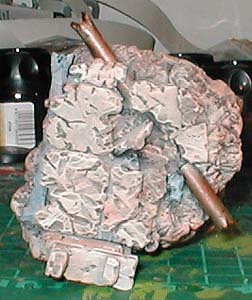
Stage 4: Finishing up: At this point I went back to the base. With Hazael's right arm bluetacked in place, I could position the models and place the extra bits on the base. I used a thin layer of filling plaster for the mud, by slapping it in place with a butter knife, and then sliding Hazaels foot through it to make a skid mark where his foot is slipping. Also added shards of broken tile with some more Knead-it. I undercoated and then drybrushed (Stages 4A & 4B) the same as the rest of the base. I actually left the paint a little bit thinner on the mud, so that more grey would show through, giving it a slightly different texture to the rock. The tiles, on the other hand, were drybrushed a lot heavier, and given a heavier highlight of Skull White, to make them stand out more. The wall section was painted the same as the tiles. (Stages 4C & 4D) |


Step 1K |
Step 1L |
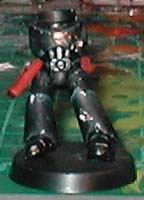
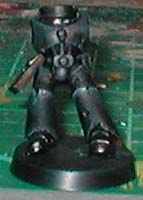
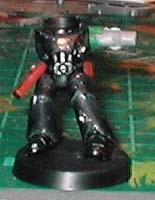
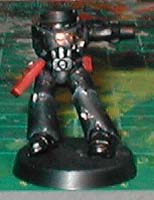
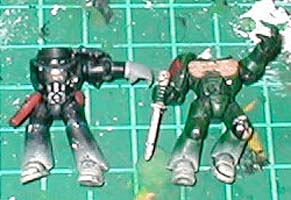
Hazael's body mostly finished off, just the final highlights to go. Started with a black undercoat, then painted on a mix of Chaos Black and Shadow Grey, highlighting by adding more grey. The plan was to try for a deep grey that still looked black, but without the shiny, 'just painted yesterday' look that you usually get on black marines. (Stage 3C) Then pulled out the Boltgun Metal again for all the usual bits, and |
Step 3A |
Step 3B |
Step 3C |
Step 3D |
Step 3E |
Step 3F |
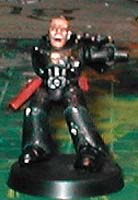
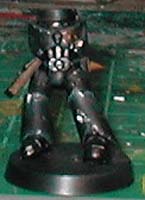
the battle damage. Also painted over the chest plate with straight Chaos Black, in the shape of a normal chest eagle, and added small nicks of Boltgun Metal around the edges, to look like the eagle has been chiselled off. (Stage 3D) Finally, painted the holster and pouches with Red Gore, then Blood Red, highlighting with Fiery Orange/Blood Red mixed. And painted the Skull on his chest with Vomit Brown and Bleached Bone. (Stage 3E) It was while gluing these pouches on that I realised I'd forgotten to do them for Gabriel. I quickly whipped out a scabbarded knife from the Space Wolf accessory sprue, cut off the knife handle, and drilled out the mouth of the scabbard with a 1mm drill bit. Then came the problem of figuring out how the heck to paint it. What I came up with was to simply glue the side of the scabbard mouth (the spot that the glue will go on to stick it to Gabriel) to a piece of sprue. Use superglue here, as it will just snap off easily when done, then just shave off any excess glue, and stick it in place. With that Brother gabriel was complete with left arm and scabbard. (Stage 3F) Brother Hazael now also has a left arm. (Stage 3G) This required some filling with GS for the shoulder joint, and various bits were finished off and undercoated, ready for finishing touches. I then added on his head, and left shoulder paultron. The paultron required a small amount of shaving inside to fit over the outstretched arm. (Stage 3I) |
Step 3G |
Step 3H |
Step 3I |
Step 3J |
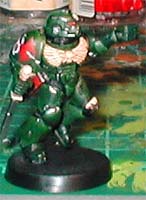
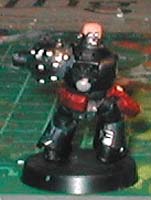
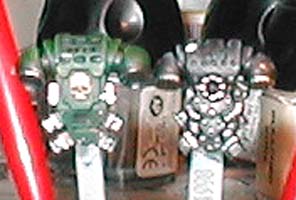
I then painted up the two backpacks. As you can see, I've continued the 'old armour' theme for Hazael by using an old 2nd Ed backpack. I also painted their chapter badges onto the shoulder pauldrons at this point, but couldn't get the pictures to turn out large enough to see the detail. To fit the marines into the base, I muddied up their feet with a drybrush of Bleached Bone, followed by a highlight of white. Brother Hazael now also has a left hand glued |
on ( to make the bolter-holding left hand, simply cut off the arm, and then re-attached facing down), and a right arm ready to go on. The right arm is the standard marine assault arm with bolt pistol, although I cut off the pistol and bent the wrist inwards by cutting wedges out of each side, bending it over, and filling with green stuff. I then stuck on a 2nd Ed bolt pistol. Hazael's right arm could then be glued on, by applying a small dab of glue, standing both marines in their places on |
the base to check the fit, and slotting the arm into place. I had a small panic when I tried to fit the last two shoulderpads on... Hazael's pad wouldn't fit between the bolt pistol and his arm! After muttering a few naughty words, I simply shaved down that corner of the pad, and sliced a tiny piece off the back off the pistol. Then came time to put it all together. I applied a small dot of superglue to both marine's feet and slotted them into place on the base. Then, a small dollop of plastic cement to their necks, and sat the heads in place, turning them so they were glaring directly into each other's eyes. A bit more superglue to re-attach Gabriel's scabbard, which I had managed to knock off while painting his feet. I decided at this point that the base was a little plain, so grabbed an axe from the old Chaos Marine weapon sprue, sliced up the blade a bit, and slapped on some Boltgun Metal. Then took a Bolter, cut off the magazine and drilled out the magazine slot with a 1mm drill bit and hobby knife, and painted it up. |
Step 4A |
Step 4B |
Step 4C |
Step 4D |