

THE LAZY PAINTER'S GUIDE DARK ANGELS SPACE MARINE By Chris LS |


PAINTING THE UNFORGIVEN |


This article has been published here with the express permission from Chris LS. |
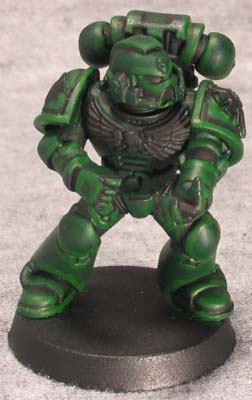
Step 4 - Highlighting (may be skipped) At this point I highlight the basecoat. You don't have to a model can look fine with just dark lining or even with a basecoat and a few details. However, highlighting is what really makes your model look great on the table. It can also suck up the most time in painting. I hear about these great painters putting 4, 5, 6, or more highlights onto their showpieces. We're not going for a painting prize here on a single mini, we just want to look good on the tabletop. I don't put more than one highlight on. I've experimented with two, and the difference is almost invisible at tabletop distances. This is important enough to warrant Lazy Painter's Rule #4: LPR #4: Don't go crazy with highlighting. I like my highlights to be fairly bold, but not overwhelming. In my example model, I used a thinned down 50/50 mix of DA Green with Snot Green. I found that straight Snot made the models look too bright without giving more definition. I also used pretty thick lines. These highlights are bold and heavy. Trust me, they work. At the end of this tutorial, I'll show you why. Time for this stage: 25 minutes (my original batch of paint was too thin and I had to repaint several areas I hate repainting! 15 minutes is probably a better estimate without the error) |
">

">
">
">
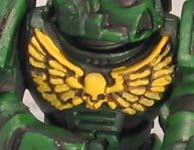
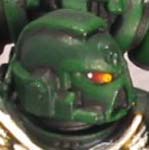
Step 5 - Detailed Basecoat The detail painting on the Marine requires a base coat because the colors are much brighter than the rest of the mini. Is the paint you put down now going to be directly visible later? No. However, this one coat of an intermediate color means you only have to put down one coat of the detail colors instead of three or four coats for the same brightness. Two coats vs. four coats: you make the call! I've used Beastial Brown for the basecoat on the emblems and the chest eagle. If you have other details you want to paint, like purity seals, skulls, or other items, you should basecoat these as well. I didn't paint the eye sockets because I just haven't found it necessary. |
">
">
">
">
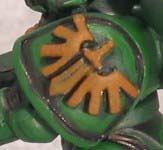
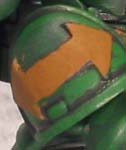
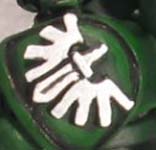
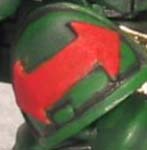
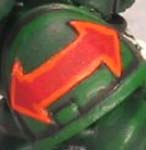
Step 7 - Details: OK, we're starting to get a Marine. Now it is time to get some of the details painted. This includes highlighting the main colors of the details. You can leave out the highlighting at this point, but the time it takes for this stuff isn't all that much. First, let's hit the Dark Angels chapter badge. It's real simple straight Skull White. I personally think highlights are unnecessary here, though you may want to take some black paint or ink and redefine the center of the blade. Next I'm going to paint the tactical badge Blood Red. This is followed up with a highlight of Blazing Orange, which really makes it pop. If you have purity seals, the best way to paint those is to put down a layer of Bleached Bone on the paper with a couple "stripes" of a Bleached Bone/Skull White mix to simulate ripples in the paper. The seal is, like the tactical badge, Blood Red highlighted with Blazing Orange. Time for this stage: 5 minutes |
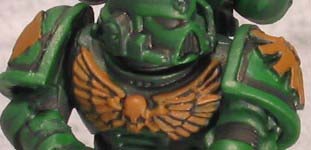
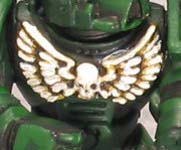
Step 6- Chest Eagle This is the payoff for your Marine. If you leave the rest of the Marine unhighlighted, undetailed, and generally boring, paint the eagle well. A well-painted chest eagle will make your entire model shine. I've heard about another, possibly easier method for painting chest eagles paint them white, wash them with black ink, then paint just the feathers white again. However, I haven't tried it, and the rest of my Marines are painted this way, so here it is. This is the only part on which I'll use multiple layers. OK, two layers. Like I said, I'm lazy. The next layer is Bubonic Brown, which is again painted onto individual feathers. After this, I put on a 50/50 mix of Bleached Bone and Skull White. This layer is put on leaving some of the Bubonic Brown showing towards the center of the eagle, which gives more definition to the model. If this is done right, you can see individual feathers from tabletop distances. Time for this stage: 12 minutes |
">
">
">
">
">
">
">
">
">
">
">
">
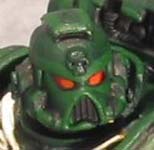
Step 8: Eyes: I have seen some of these great eye tutorials and have tried a couple of them out. I personally find it really hard to get these razor fine lines into the tiny eye lenses. So what do I do? Make big, bold highlights that make the eyes pop from table distances. Some of the same principles are at work as in the higher quality eye lenses with lighter and lighter highlights with a white dot in the darkest part. I first fill most of the lens in with Blood Red. It's mostly dark because it has the black basecoat. |
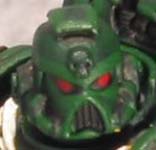
Next is Blazing Orange on the forward half of the lens, followed by Golden Yellow at the innermost point. Then put a little, tiny dot of white in the back part of each lens this is much easier than it sounds, just make sure you don't pick up a lot of paint when you do it. It looks a little funny up close, but at distance, it gives the impression of these burning eyes. Time for this stage: 3 minutes. |

Refer to LPR#2. Note that I've painted the chest eagle very carefully (or at least tried to!), leaving the black primer showing between the feathers. I'll get more into the chest eagle below. Time for this stage: 6 minutes (chest eagle took 4 minutes) |