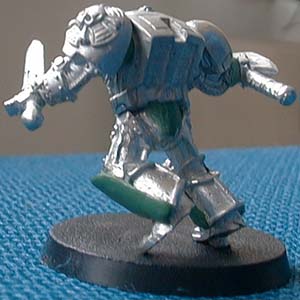
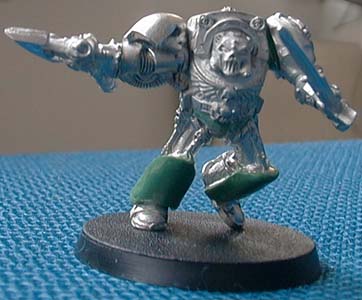
Step 2 - Detailed sculpting: I noticed that the legs where looking a little skinny compared to the shoulders and when the wolf icon was filed away, I decided to chunk them out a bit. So out came the Green Stuff. In the process I also filled out his buttock as it was also not looking right in size. Filled out his left armpit, the cracks around the waist and the space behind the axe on the right arm. The only Green Stuff add-ons left will be some more work around the waist and chapterisation using GS molds of a Dark Angels |

PROJECT: MASTER OF DEATHWING By Johann Söderland ( Arch Angel Cragganmore ) |


CHARACTER CONVERSIONS |
Step 1 - Preparing the body: So, last night I put him together and noticed that the left arm did not look all that good. It looked cramped some how, compared to the right one. The solution was simple, angle it outwards. Now it looks more in line with the rest of the model. The waist is story in it self as the fit is better than I could ever have wanted and the only putty work that needed to be done is to fill the small gaps at the front and back as well as model the joints at the hip back together. A bit of filing is still to be done, for exemple the wolf symbol on his leg. I am also planning on giving him a cape or cloak but I realy want it to be as different as the mini in itself. Maybe something hanging down from only one shoulder....... |
">
">
">
">
">
">
">
">
">
">
">
">
Step 4 - More sculpt on details: A lot more has happened since stage 2. Green Stuff add-ons in form of angels on his shoulder and right leg, a Terminator honours badge hanging from the waist, feathers on his left knee and skull pattern joints at the knees. I also added a bit of GS to seal of more of the waist. The sword has been repositioned so it now drops down with his arm moving slightly backwards. This is to emphasize the running movement a bit further. |
Project Master of Deathwing: Initial concepts and Thought Process Here we go again, a new conversion idea and no money to spend! The idea came to me as I was looking at my terminators and noticed that the Terminator Chaplain's upper body is really cool, especially the helmet, and Logan Grimnar's legs are the most dynamic in the Terminator range of miniatures. The conversion in itself is very straightforward. Simply cut the two miniatures in half and pin them together. These are the bits I will use: I start with Logan Grimnar, all hacked up. His legs and his right arm will be used. The Chaplains left arm will be used. I cut the hand off so I can fit the Terminator Captain's sword there. I will also use his upper body. The axe is from the Chaos Lord which I converted into a Wolf Lord for my brother and he wanted twin Lightning Claws. It will be held in the right hand. The Banner pole is from a Death Wing Terminator Sergeant. |
Figure 6 |
Figure 3 |
Figure 5 |
Figure 4 |
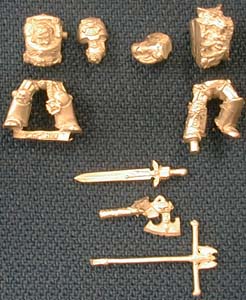
Figure 1 |
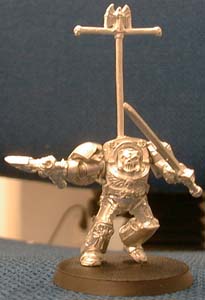
Figure 2 |
banner top and the Rosarius carried be the original Terminator Chaplain. The cloak is yet to come as well. |
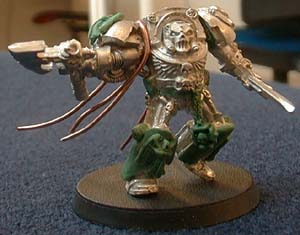
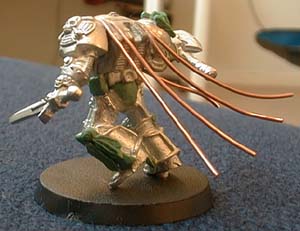
As you can see in the image above I have now attached a number of copper wires to the top of the body. These are then roughly bent into the final shape I want of the cloak. To fasten the wires to his body I filed groves into it and glued the wires into them. I then file them down to get a smooth finish to work on with the Green Stuff. |


