
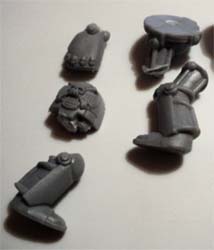
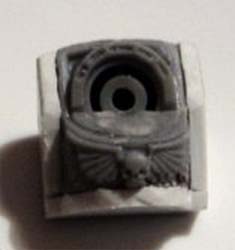
Step 2 - Adapting the Terminator Torso: The torso of the plastic terminator is relatively small in relation to the whole model and in particular to the height of the legs. Just take a terminator model and measure the body and legs and then look at it for a while, you'll notice it. I widened and hightened the termie torso by using plastic card as shown in the images to the right. |

TWO HEADS TALKING DEATHWING LIBRARIAN By C J van der Have ( Brother Lorien ) |


CHARACTER CONVERSIONS |
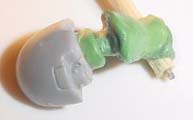
Step 1 - Preparing the parts. : First, having decided on the general idea of the pose the librarian was going to be modelled in, I used a fin jewellers saw to cut the legs at the aprropriate joints. The left leg was divided at the hip joint while the right leg was divided at the knee joint. At this stage, I also cut the arms just below the shoulder pads. Also, depending on the pose of the character and background, I chose an appropriate head from my bitz collection, that could be easily adapted to the Librarian's torso. Having considered the spacewolf head above I finally chose the partly bionic head of the Chaplain as it suited the character of the librarian better. |
">

">
">
">
">
">
">
">
Step 3 - More sculpt on details: I then concentrated on getting the stance of the legs right. Using the pinning technique to pose the legs and find the final position, I then used polystyrene glue to fix them in place. A little bit of green stuff was then used to smoothen the joint lines. The widened torso was then positioned carefully and glued in place. I spent a bit of time getting the position absolutely correct. The head was then glued in place and green stuff |
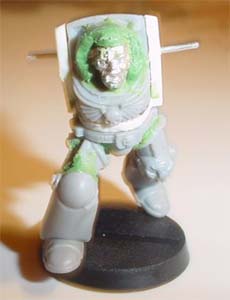
How to convert a Librarian of the Deathwing: Initial concepts and Thought Process I was planning on creating a Deathwing army based on the famous short story "Deathwing" by Bill King from the anthology by the same name. I plan to model all of the characters and all in dynamic poses. This would include the captain (Cloud Runner), Sergaents (Weasel-Fierce, Bloody-Moon, Lame-Bear) , the Librarian (wo-Heads Talking) and the dreadnought (Hawk Talon) and the respective squads. I seriously plan on modelling them all in dynamic poses. This is my first attempt at producing a dynamically posed Deathwing Terminator. A box of plastic terminators is the first essential ingredient required to begin the process. |


Figure 6 |
Figure 5 |
Step 5 - Sculpting and detailing the arms: Once the gauntlets had cured well, I concentrated on the middle sectionin the region of the elbow and forearm. I used further greenstuff to create the elbow joint and to bulk up the arm. Then added the coiled wire to represent the power cords and cables supporting the arms. You can learn in detail how to make realistic cabling n the article by Brother Sinear - How to make flexible tubes. After discussing the details of the shoulder iconography in the dark Angels Forum of the B+C chatboard I modified the existing plastic crux by adding the two horns to the skull. I then added lightning bolts to add greater emphasize the fact that this |
">
">
">
">
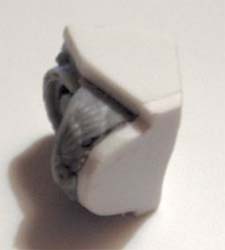
Dont try to cut the plastic card directly in the shape because you'll have to do it repeatedly to get it right. Much easier to simply stick a slightly oversized plastic card on to the model and then slowly cut away the excess with a modelling knife. This also has the added advantage of separating the shoulder more to allow manipulation of the arms when they are modelled. Finally I cut away the plastic terminator head to make way for the new one. |
">
">
">
">
used to model the terminator hood. Finally pins were inserted to each shoulder to support the arms that I was going to create next. |

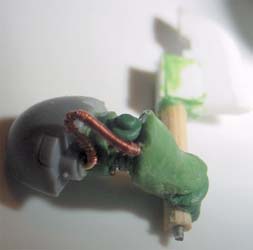
Step 4 - Sculpting and detailing the arms: I couldn't find any nicely detailed and well positioned arms that would fit in with my planned pose for the librarian. So I chose to make my own from greenstuff. I first used an armature from the shoulderpads to the hands and into the wooden handle of Two Heads Talking's Axe. |


Then I slowly layered greenstuff on it, small amounts at a time till I got the desired bilk and detail. I let the greenstuff on the hands cure and slowly build up a gauntlet look to them. |
">
">
">
">
">
">
">
">
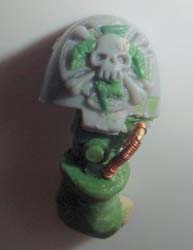
is a librarian. I then followed these changes to all the skulls that were visible on the miniature. |
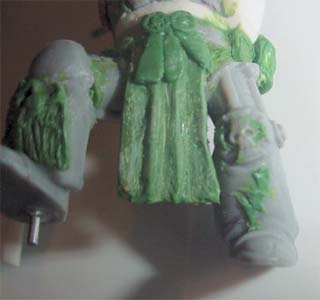
Step 5 - Sculpting more details: Having more or less completed the work on the arms, I next set about adding a tabard for the librarian. I created a wire frame to provide strength, and over that I layered greenstuff to create the tabard. I then set about adding details to the Deathwing Librarian. |
This would mostly be done by greenstuff sculpting or casting. I first did the lightning bolts with intsi-bitsi teensy balls of greenstuff. I started by pushing and stretching one in to place and form and then adding the next one. As mentioned earlier, I continued to add horns to all the skulls on the model. A few purity seals came next made with a similar technique. |